Lesson #4: Classroom Applications
Now that you have seen the many ways a SMART Board can be used in the classroom, we need to think about the ideal placement of the SMART board in the classroom.
Where is your SMART Board? Do you think it should be moved or should it stay in its current location? If you are working in pairs or a group, please share your thoughts.
Where is your SMART Board? Do you think it should be moved or should it stay in its current location? If you are working in pairs or a group, please share your thoughts.
By the end of this lesson, you will be able to......
1.....share with others how the SMART Board would be best set up in your individual classroom.
2.....share at least three ideas for using the SMART Board daily in your classroom.
3.....share at least one resource found on the SMART Exchange Website and at least one other online resource that will be useful to you as your design instruction for your classroom.
2.....share at least three ideas for using the SMART Board daily in your classroom.
3.....share at least one resource found on the SMART Exchange Website and at least one other online resource that will be useful to you as your design instruction for your classroom.
Where should you SMART Board be placed in your classroom?

Because the SMART Board is the center of instruction, the board’s optimal position is at the front of the room.
Where is your SMART Board? After learning more about the possible uses of the SMART Board, do you think it is in the ideal location? If you are working with a partner or group, please discuss this topic and share ideas with each other.
Where is your SMART Board? After learning more about the possible uses of the SMART Board, do you think it is in the ideal location? If you are working with a partner or group, please discuss this topic and share ideas with each other.
Through Lessons 1-3, you have been introduced to the basics of using a SMART Board as well as learned a lot about using SMART Notebook Software. Next, let’s take some time to think of ideas about how you could use the Smart Board in your classroom. Please watch the following videos, review the readings, and take at least an hour to explore the various resources that are available to you online. As you are researching, please write some notes about how you may be able to use your SMART Board in the classroom.
Think about how you could change a lesson that you normally do in your classroom by using the SMART Board.
Think about how you could change a lesson that you normally do in your classroom by using the SMART Board.
Tutorials/Readings/Hands-On Time

Handouts- Please read through these handouts.
SMART Boards- A Real Asset?
SMART Board Resouces: Elementary Teachers
SMART Board Resouces: Secondary Teachers
SMART Boards- A Real Asset?
SMART Board Resouces: Elementary Teachers
SMART Board Resouces: Secondary Teachers

Bonus Activity (It's Fun!)
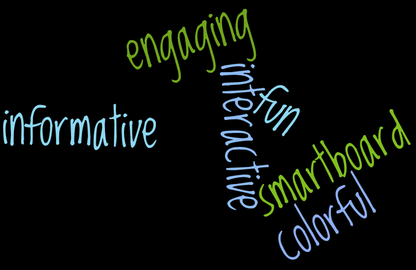
Now that you have explored many possibilities of how to use the SMART BOARD in your classroom, it will be fun to come up with a few words that describe the SMART Board.
Use Wordle, http://www.wordle.net/, to make a word cloud of at least five words that describe the SMART Board. This can be shared with your students in order to show them how excited you are to use the SMART Board in your classroom.
Use Wordle, http://www.wordle.net/, to make a word cloud of at least five words that describe the SMART Board. This can be shared with your students in order to show them how excited you are to use the SMART Board in your classroom.
Self- Skill Assessment and Collaborative Document Activity
Now that you have worked through the tutorials, read the readings, and have spent some hands-on time on the SMART Board, please complete this self skill-assessment to make sure that you feel comfortable with all of the topics and skills that were covered.
If you find that you need more time, before moving on, please review the Tutorials/Readings/Hands-On section.
Skill Assessment
Lastly, please share your ideas and resources you have gathered through the lesson with other teachers by adding them to the Google Document: Share Ideas!
If you find that you need more time, before moving on, please review the Tutorials/Readings/Hands-On section.
Skill Assessment
Lastly, please share your ideas and resources you have gathered through the lesson with other teachers by adding them to the Google Document: Share Ideas!
Great job!
You are now ready to integrate your SMART Board into your classroom!
Have fun with this interactive tool!
You are now ready to integrate your SMART Board into your classroom!
Have fun with this interactive tool!
